Friday, March 23, 2018

Showcasing Cards by Kayte W.

I would like to share these wonderful cards created by Kayte W.  She tells me she has been designing cards for only a year.  All I have to say is that she must be a very fast learner.  See for yourself.....
.
The outside has so many interesting layers.  Her technics are beautiful.  And the inside of the card leaves room for a short message.


Check out Kayte's coloring skills.  How cute is this card?


This card is striking with it's dramatic colors and many layers.  Again, the inside of the card carries out the theme but leaves plenty of room for writing.


And the last one...


A big thank you to Kayte for sharing her amazing talent with the charities I send cards to.  I know these cards bring so much joy to those who receive them.

TIP OF THE DAY:  Yes, I do encourage card makers to leave the inside of the cards totally blank. This is by request of the charities.  But, there is always an exception to the rule, and Kayte has given perfect examples of this.  If you do decorate the inside, please leave as much room as possible for the sender to write a message. 
Thank you for stopping by today.
Hugs,  Jill


Saturday, March 17, 2018

Let's Get Organized

Hello, I'm back.  Had a small accident and am currently wearing a splint on my left pinkie which makes typing and card making a bit awkward.  So, I decided to tackle a project I've been putting off for a while.  My niece turned me on to this idea - thanks big time, Kelly!  I do not own a lot of dies, but in my case "out of sight" is definitely "out of mind".  I originally stored them in empty CD cases with labels telling me what was inside.


Good idea, but not the best.  So, based on Kelly's suggestion, I took an old bulletin board which she painted for me, added magnetic strips and ta-da....


Now I can see all of my dies at once.  I sorted them a bit better after this pic was taken and now they are in "like" groups.  I bought the magnetic vent covers at my local hardware store, cut them lengthwise and used tacks to adhere it to the bulletin board.  Now, all I have to do is hang it on the wall!

TIP OF THE DAY:  Watch where you are walking.  Tripping over your own two feet can indeed cause bodily harm.  
Thanks for stopping by today. 
Hugs, Jill


Friday, February 16, 2018

Fiesta Cookies

Morning.  No cards today - just showing you why I have been AWOL from the craft room...one of my nieces, Madison, is giving a Mexican themed bridal shower for her best friend and asked me to make cookies for the party.  Here is the result:


A big thank you to my other niece, Kelly, who came over and helped.  Such a fun day!

No TIP of THE DAY as I am running late for Mah Jongg!  Thanks for stopping by.
Hugs.

Tuesday, February 6, 2018

Super card maker Roberta G.

I had such a great weekend.  Hubby and I spent several days in Arlington, Texas visiting relatives.  While there, I took the opportunity to meet a long time friend face-to-face.  Roberta and I met through Operation Write Home many years ago and have kept in touch via email.  We are both avid card makers and exchange ideas, stamps, designs - whatever.  Although we tried to meet in person last summer here in Houston, a little weather system called Harvey got in the way.  So, after many years of being internet buddies, we met in Arlington and are finally "for real" friends.  Of course we exchanged stamps and dies and laughter.  Roberta is one of the talented card makers who helps me supply cards to my various charities and she had some ready for me when I arrived.  I want to share some with you as her cards are awesome.  I love her designs and how she pays attention to detail.  See for yourself.....

This may be my favorite of the selection she gave me.  Something about the softly stamped flowers in the background just makes it extra special.  And of course one of the stamps matches the circles on the blue banner.


Notice how Roberta matched the curlicue of the background embossing with the curlicue of the design.  Little things like that make the card look so polished...so professional.


I particularly like the layout of this card.  Using several small images, she has your eye travel over the entire card.  Great use of space!


And here is that adorable panda from Stampin' Up.  The way she used the blue stamp makes it look like the panda is tossing confetti.  Isn't it cute?


Thank you, Roberta, for sharing your talents with kids in need.  These are fantastic!

My TIP OF THE DAY is very basic:  When you use colored cardstock for the base of your card, always line the inside of the card with a white or ivory liner.  Even yellow or pale pastel cards need liners.  Not only do these inserts make the card look more professional, but they allow the use of pencil when someone writes on it.  A lot of my charities do use pencils instead of pens, and the writing shows up much better on white liners than any pale color cardstock.  If you don't believe me, try it for yourself. Many of the senders of these cards are kids and they don't always press down hard when they write.  So, please keep this in mind.
Thank you for stopping by.  Hugs.
Jill

Sunday, January 28, 2018

Super cards made by Barbara S.

I want to share Barbara S.'s cards with you because they are so adorable!  Barbara is a first time donor to me, but I certainly hope she becomes a repeat donor.  Her cards are so perfectly made with attention to details that is truly amazing.  I know the kids are going to love them because I had such fun unpacking them, smiling all the while.  Here are but a few of her precious cards:

                      I adore this first one - who wouldn't love to get this from their sweetheart?


                                    And of course all of these are too cute for words!


Thank you so much, Barbara.  These are going to cheer up so many hearts.

And now my TIP of THE DAY:  On Thursday of this week, my niece was kind enough to post a message on the app called NEXT DOOR.  It is a way for members of a community to communicate with other members of the neighborhood via social media.  Anyway, she posted that I make hand crafted cards for various charities and could recycle empty printer ink cartridges, making money to offset the cost of supplies.  Low and behold, by that afternoon, I had received more than 100 cartridges from people in my area.  And they are still coming in!  One woman even called to say she did not have any cartridges for me, but she had a large box of used and new craft/paper supplies I could have if I wanted.  I couldn't say YES fast enough.  So, if you are at all phone savvy, try posting on NEXT DOOR that you can use donated craft/paper supplies or empty ink cartridges (then take them to your local Staples or Office Depot for recycling). At $2.00 store credit for each cartridge, it adds up!
                             Thanks for stopping by today.  Have a great crafting day!
                                                                      Hugs, Jill

Monday, January 22, 2018

WHOOPS! My bad.

I forgot to include a "Tip of the Day" on my last post, so I will make this all about one of my favorite card making tools, the stamping tool that I can not live without. This stamping tool allows you to stamp an image over and over in the same spot in case you need a cleaner, clearer image than first stamped. There are several brands of this tool - I happen to own not one but two of these tools. One of the large size, one of the small size.  I simply cannot stamp without them now. No, I won't mention the brand I have because truth be told, if I did not already have two , I would buy the Stampin' Up one. Unfortunately, they are not quite ready to be sold to the public, and won't be until June, but here is my TIP OF THE DAY:  My Stampin' Up Demonstrator will have one to sell next month, in February!  She will of course have plenty when they go on sale to the public in June, but the first card maker who contacts her now will get to reserve the one she will receive in Feb.  Here is her info:

                                                   Janet Bailey   bspruce2000@yahoo.com 

Please watch YouTube videos to see how incredible this stamping tool is.  So versatile!  So addictive!  You will fall in love immediately and begin to stamp more and more. 
Thanks for stopping by.  Hugs, Jill

Tuesday, January 16, 2018

Snow Day in Houston, 2018

I realize the rest of the country is laughing at us today - we had a flurry of a dozen snowflakes today and our city is shut down.  Schools and freeways are closed and everyone is being encouraged to stay home unless it is an absolute emergency.  Yes, the streets are icy and temps are in the teens, but still.....  Anyway, I took this great opportunity to make cards.  Most of my charities do not want actual Valentine Day cards - they would rather have general Love cards so that they can be used all year long.  I made a few of each.  Enjoy.

This one always makes me smile.  I imagine young boys will get a kick out of it as well:


And who wouldn't want a big 'ol hug from this fellow:


This reminds me of a song I used to sing to my kids when they were little:


Here is a new type of fold I just played with for the first time.  It's called a "U" card.  Once I figured out the technique and dimensions, it wasn't too hard, just time consuming:


And the one that actually says "Happy Valentine's Day":


And that's it for today.  Weathermen are predicting  more bad weather for tomorrow, so I guess I'll be crafting more cards.  Not a bad way to spend a dreary day.  Hugs, Jill


Tuesday, December 26, 2017

Getting Back to Cards

Hope everyone had a joyous holiday! Now that the season is winding down, I am back to creating cards.  I needed a graduation card but found I didn't have any appropriate stamps.  So, I went to the computer and downloaded a free digi.  I normally do not use digis because it is my personal philosophy that all images need to be heat embossed.  If I stamp it, I heat emboss it.  And digis from the computer do not allow for embossing.  Or do they?  I remembered from years ago a neat embossing pen that I have not used in ages.  The main reasons are: 1) I don't use digis and 2) I was never happy that using the embossing pen over white or yellow or other light colors changed the color I had wanted.  That was because the Versi-mark and Zig embossing pens have a light blue ink and when used over other colors, change that color.  After a bit of research, I found Ranger embossing pens that have a clear ink and DO NOT change the color of the image or underlying colors.  So, now when I need to do spot embossing, it is easy enough.  Here is a picture of my digi:  on the left, straight off the computer.  On the right, the tassel and bow are embossed.  I decided not to emboss the whole image, but to have these two items "pop".  Not the best picture, but you can tell how shiny the tassel and bow are, right?


Here is the card I made:
Because the upper half of the card has a circular design, I chose to round the top corners to give the card some continuity.  The bottom corners I left alone to match the bottom design.  And of course, since I needed to line the inside of the card, the liner matched the outer overall design.


TIP OF THE DAY:  Embossing pens are fun and very convenient for spot embossing.  The Versi-Mark and Zig pens have a blue ink and therefore, change the color you are embossing.  The Ranger pens do not.
Hope you can see the blue under-tones on the left.  The yellow is more an off green and the white is now pale blue.  The samples on the right remain true to the original colors.  I found my Ranger pens on Amazon.

Thanks for stopping by!  
Hugs, Jill


Saturday, December 16, 2017

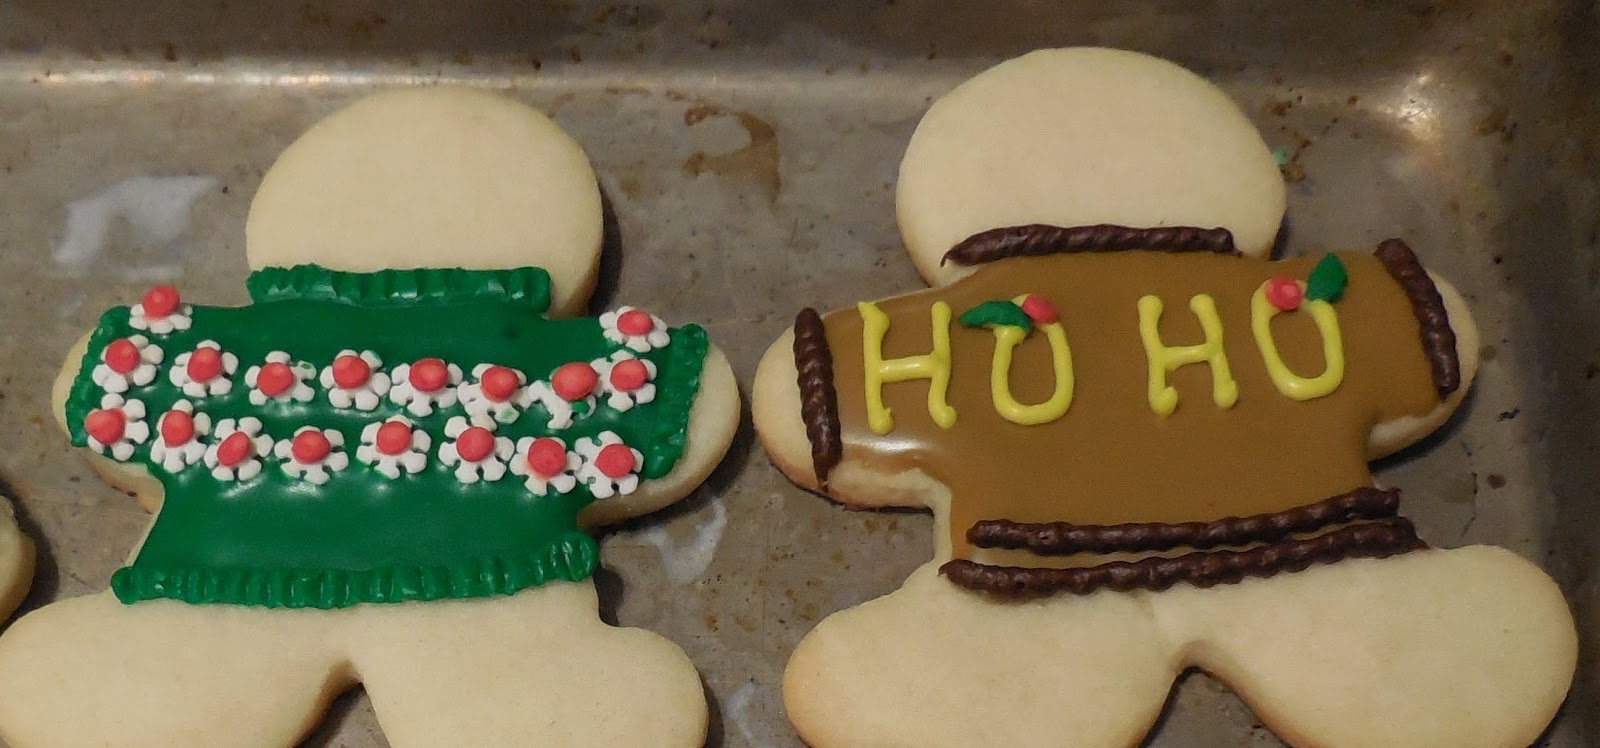
Ugly Sweater Cookies

Happy Holidays!  Now that I have all the cards mailed out to the various hospitals and charities, I am spending a little time actually getting ready for the holidays!  One of my nieces had an Ugly Sweater Party last night, so I helped make cookies for her guests.  I do love baking....


Hope these brought a smile to your face and heart.  Have a safe holiday!  
Hugs, Jill

Monday, November 27, 2017

Holiday Cheer


Ah, something new today - nothing to do with cards.  After years of not putting up a tree, I decided to go back to my traditions and put one up.  I use an artificial "Charlie Brown" tree and this year hung my bread dough ornaments.  These are from the late 70's - yes, that is 1970 - when I was a single mom and making a few extra dollars by selling home crafted bread dough ornaments.  Remember that craft phase?  I couldn't believe how well these are holding up after all these years.  Hope you enjoy a bit of nostalgia.  I certainly did.  These ornaments brought back so many wonderful memories.  You can't help but smile when your heart is filled with joy:


                                                  Thanks for letting me share a few memories. 

My TIP FOR THE DAY is to de-stress your holidays so that you can enjoy the moment.  Simplify.

                                                                        Hugs, Jill

Wednesday, November 22, 2017

Saturday, November 18, 2017

Penny's Cards

Today I would like to share some of Penny W's cards.  She is a true artist who uses her talents to make the most interesting cards.  I know my photos will not do them justice - take my word for it, they are outstanding.

I am guessing at her techniques, but it appears she inked or painted a background and then drew the flower-like images on top of her colors.  It gives such a unique look to her card.


In this one, she definitely inked or painted her background, stamped her image and then did the zentangle technique.  Lots of work for a gorgeous card.


Here, she used stamps to create this look.  I love how Penny thinks outside the box and comes up with such fabulous creations.  These could easily be framed and enjoyed as art work.


 Last but certainly not least, I love Penny's collages.  This is a technique I love but have never quite mastered. I love her colors, her layering, everything about this card.  Such talent!

Thank you, Penny W. for allowing me to show off your creative cards.

And now for the TIP OF THE DAY:  It is amazing how much difference the weight of the cardstock used for the card base makes.  I use the 110 lb. paper from Michael's.  It is quite sturdy and the finished look and feel of the card is very professional.  Although it costs $14.99 per package, Michael's usually has a 50% coupon, sometimes even a 60% coupon.  I never buy the paper at full price.  ALWAYS use a coupon.  
SECOND TIP OF THE DAY:  Sign up for Michael's Rewards program.  You can do it as you check out and that is how I get so many 50% coupons.  About every 5-6 weeks, I also get 60% coupons.  It is free and well worth the 2 minutes it takes to sign up.  You're welcome!
Hugs, Jill