Sunday, February 27, 2022

Adult Cards

Good morning.  It's been far too long since I have posted anything.  Life has been busy, busy, busy.  Now that things have settled down a bit, it's about to get hectic once again.  One of my charities has asked for "thousands" of male cards.  WOW!  That really caught my attention.  They have specific requirements so what better way to get them out to you but on this site.  So, here goes.....

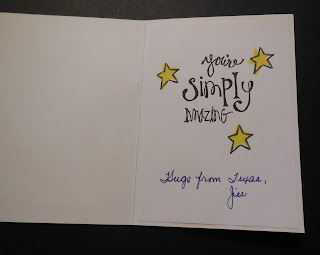
These cards will be going to military units - BUT, they are NOT to be military themed!!!  They are to boost the spirits of those who receive them.  Examples below.  This blog post is for those card makers who would be interested in finishing them on the inside so that I wouldn't have to. (It really would save me hours.)  This charity wants something encouraging written inside and signed with your name and location.  Because I do so many, I have told them that I can not physically write in each one (I do thousands and in many different languages).  So, I run off inserts and then sign my name "for real" (all of these will be in English).  Again, see examples below.  If you have any questions, please feel free to ask.  I would love help with this project but I also know this is not for everyone.  Thank you and have a great day!

           Outside of card can have appropriate sayings or not:


Here is the insert page I run off then cut down to tape into the card:


Here is the inside of a finished card.  I always use a colored pen to write my ending and name so that it stands out as handwritten.

                                        Do let me know if you have questions.  Air hugs, Jill

Tuesday, June 1, 2021

Scan and Cut Tip - Make "new" mats for next to nothing!

 Happy June!  It's been a long time since I posted - hope everyone is still safe and sane.  

I have been watching YouTube videos on how to make Scan and Cut mats for pennies.  There are many different ideas out there as to how to make all the black marks on your new mat but I always try for the easiest way.  And that is to cut off the top and bottom of your existing mat, turn the mat over and tape the strips you just cut off the front onto the back.  I used strong clear packing tape and it works just great!  After you create your new mat, you do need to use some sort of repositionable glue to make the mat sticky.  I used Zig glue and I'm telling you, this is like a brand new mat.  When this side gets too yucky to work well, I will go to the store and buy a plastic For Sale sign and put these strips onto those.  I may never have to buy a real mat again.  Hope this helps.  

I had cut up the nasty mat before I thought to take pictures.  So, pretend this mat is in terrible shape.


Cut off inside the black line, top and bottom.

Turn center part over and tape the tope and bottom strips on with heavy duty packing tape.

I taped both sides of the strips.
This is your new front.


This is your new back.    


Coat the surface with a repositionable glue and let dry.

Enjoy your "new" mat.

Thanks for stopping by.  Air hugs,
Jill


Thursday, February 11, 2021

Bookmarks for a Cause

Good morning on this rainy, cold February day.   It's a great day to try something new.  How about making some bookmarks for a charity named Cardz for Kidz?  They have expanded their "clientele" and now include senior citizens in their deliveries.  They need bookmarks to send to these seniors.  Interested?  Here is what they are looking for:

**Uplifting sayings to cheer the receiver of the bookmark

**Bright, fun designs and images - just like a card

**No particular shape or size - pretend you are using it and go from there as to what will work

**Heavy weight cardstock.  Heavier than 65 lb.  These need to be sturdy so they last a long time.

**Laminated, if you have a machine.  Or maybe use the self stick laminating sheets.

**String or chord to hang outside the pages

**Sign your name and preferably your state

Here are some I have made.  I use the 110 lb. paper from Michael's as a base.  Maybe I'll add a quick saying on the front to match the image but always an uplifting saying on the back with my name.  Since I have a laminating machine, I do laminate mine.  The last one makes me smile, so I'm thinking the person who gets it will also get a kick out of it.  I haven't laminated it yet....


If you are interested in making bookmarks for Cardz for Kidz, please mail directly to them.  NOT TO ME!  Here is their address:

Cardz for Kidz

516 N. Ogden  #177

Chicago, IL   60642

If you have any questions about making these bookmarks, please shoot me an email.

justjill48@gmail.com

Bookmarks that do not meet these specs cannot be used by them.

Thanks for stopping by.  Have a great week and stay safe!

Air hugs, Jill

Monday, January 4, 2021

Happy New Beginnings! 2021 Better Be Better!

 Happy New Year, everyone.  I'm thrilled we all made it though the last many months.  Talk about ups and downs!  That is one ride I do not ever want to go on again!  Let's all keep our fingers crossed that things will only get better from this day forward!

As I was cleaning up my craft room recently, I took a long look at my C plates for my Cuttlebug and decided enough was enough.  I was going to splurge on new ones.  My photos are not very good, but I'm sure you know what I mean when I say these have seen much better days.  So many dents, so many cuts, so much gunk caught in the grooves.....  It makes for a very rough back of whatever you are cutting out.  Normally, that does not matter, but occasionally you need the back of a cut-out to be clean and smooth.

So, right after I ordered a new plate, I decided "What the heck"?  I can't ruin this one...so, I sanded it down.  Yep, used my hand-held electric sander with 60 grit paper and sanded both sides.  I couldn't believe the difference it made.  


It may be hard to see the difference, but believe me, there is.  Now, I didn't sand too much so it still is slightly rough but it works so much nicer.  I may even go out and take a little more off both sides.  If you should sand too much surface area off, then use a shim of cardboard to help raise the height of the plate up a bit as you roll it though the machine.  I have had no problems using this as is without the shim.  It still cuts just fine.  So, if you are about to throw a C plate away and order a new one, you might take a minute to try this technique and save yourself $10.00.  Think of the stamps you can buy with that!

Thant's all for today.  Please stay safe and let me know if you need more masks.  I'm still sewing.  I have made and donated 2,545 masks to date.  Thank all of you who donated material and thread and elastic to this project.  Think of how many lives we have touched!  Hugs to all and thank you for stopping by!

                                                                              Jill

Tuesday, November 24, 2020

Whimsical 12 Days of Christmas

     Happy almost Thanksgiving everyone! I know this year's celebrations will be different, but I do hope you stay safe.  That is the most important thing to remember this year.  We have to stay healthy so we can enjoy next year and all the good things still to come.
     A friend of mine asked me to help her make cards for a  local group who will be throwing an appreciation luncheon in early December.  They wanted thank you cards in the theme of the 12 Days of Christmas.  Since the recipients will be elementary school teachers, she decided we needed to put a whimsical touch on them.  See if we succeeded:


Can you tell which ones are mine?  I did Partridge in a Pear Tree, 6 Geese a'Laying, 7 Swans a'Swimming', 8 Maids a'Milking, 11 Pipers Piping and 12 Drummers Drumming.
Beth made the rest.  Aren't these absolutely adorable?

Thanks for stopping by.  Stay safe!  Air hugs,
Jill

Monday, October 12, 2020

Halloween 2020

 Oct. 12, 2020  Oh. My.  Two blogs in as many days.  What is happening?  Actually, I had a few requests for Halloween cards so I thought I would post what I created.  Enjoy.


It was suggested that the last card with the eyes would not be appropriate for any of my charities.  It is, of course, my favorite.  The stamp was given to me by my daughter and I think it turned out very Halloweeny.

Please stay safe - thanks for stopping by.

Air hugs, Jill


Sunday, October 11, 2020

Helpful Tips

Oct. 11, 2020   Hello, one and all.  It's been such a long time since I have posted anything I almost forgot how to do it.  It didn't take me long to remember which buttons to push so here goes. I am posting some awesome tips today, inspired by a favorite donor of mine, Kate D.  Her cards are always just perfect but what I have noticed is that her dimensional tape is not too thick.  I finally asked her what she used and her answer - foam sheets from the Dollar Tree!  


Look at all of these wonderful sheets of thin foam to be cut and used as thin backing for your images!  Color really doesn't matter since it will be used behind the image, but I still like all the cheerful colors.  Now, for those of you who own a Scan and Cut, here is what I learned to do today.  I cut my images out using the .04 border setting, then changed the setting back to 0 to cut out foam outlines.  They make perfect dimensional backings.  I use liquid glue to adhere them to the image.  I think Kate uses tape.


It is probably hard to see the dimension on this card, but believe me, it is the perfect thickness to give a bit of height without being intrusive or too thick.


Another Dollar Tree item Kate recommends is their actual dimensional tape.  I bought some because they had it, but as I do not need it right now, I haven't actually tried it.  However, if it is good enough for Kate, then it is good enough for me!  If you are making a trip to the Dollar Tree, you might as pick up some - 3 rolls for $1.  Beat that, if you can.


That's all I have for now.  I hope everyone is staying healthy and sane.
Thanks for dropping by.  Air hugs,  Jill


Thursday, May 28, 2020

RED WHITE AND BLUE CARDS

                                                                                                                                             Instagram :  #just_jill_07

Morning.  I thought I would put the visual for the Red White and Blue cards collected here.  That way you do not have to scroll back to see how great of a job you are doing.  And you are indeed doing a SUPER DUPER job!  Thank You!


I will be collecting Red White Blue cards all year round.  Send them in as you want.  
Be safe!
Air hugs, Jill

Monday, April 13, 2020

SOMETHING OTHER THAN CARDS

Hi, everyone.  We are still in the middle of this pandemic and I am busy making masks for any and every one who might need a mask.  My daughter, Erica, inspired me.  She lives in Austin and when all this started, immediately reached out to her friends asking who needed a mask.  She made so many masks and freely shared them with people who needed them.  Of course she made one for me and hubby.  Here is mine (which actually says an awful lot about me...)


Now, I haven't sewn in forever long and only had a few scraps of material.  But, I started asking around and sure enough, I know a lot of people who wanted masks.  Unfortunately, I ran out of material and elastic right away.  Here is where so many angels came into my life. 

 I started getting donations of material and elastic from all over the place - friends, friends of friends, strangers.  It was so thrilling to see people helping people. Some of my card friends ordered items on-line and had them sent directly to me!  Others, sent postage stamps so I could mail the masks all over the country!  And still others sent money to help with whatever I needed to keep the masks coming.  I am overwhelmed with the kindness and generosity of people I have and have not met.  I am still making masks and will do so until I run out of supplies or this mess comes to an end.  If you want a mask, or two, please contact me.  I do not have to go to the post office.  I can just mail from the mail box at the end of the street!  Here are a few of the masks I have made so far:


Again, 
Again, if you need masks, please contact me - justjill48@gmail.  I may be out of some of these fabrics, but I have more.  If you leave a request in the comment section, I might not see it.  Please email

TIP OF THE DAY:  
If you are following the Red White Blue card count and/or want to see examples of the cards sent in, just go back one blog post.  I'm still updating it.  There are some really amazing cards to inspire you!
Thanks for stopping by today! 
Hugs, Jill