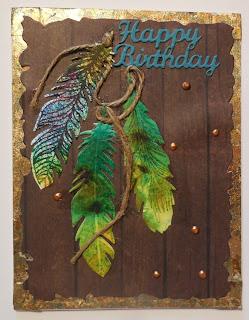
Hello again. I have been playing with Washi tape today. It's not a favorite medium of mine, but I have a stamp given to me by a good friend - Janet - which reads "Made with love. And tape,
lots of tape". Now this just screams "Use me with Washi tape" so today I did. Here are some of the cards I created :
And then some random pieces to enhance the background…..

Yes, I am making Halloween cards already. For those of you who are making cards for my military organizations, I need Halloween cards by Aug. 15. I know that seems very early, but you have to remember that I box these cards up and mail them to the different military groups. It takes a bit of time to reach them. It may then take a while for those groups to have a packing party in which they box the cards up to send to the deployed troops overseas. Those boxes of cards are mailed overseas and who knows how long that takes. After the boxes are distributed to the various units, the troops write home on them and once again they are mailed back to the states, or wherever. That is a LOT of time in the mail, going here and there and sometimes back again. So, in order for these Halloween cards to have plenty of time to travel there and have time to get back home, I need them this early. Any cards I receive after Aug. 15 will be distributed to the other charities we provide cards to. Those are all located in the USA so travel time is much shorter.
TIP OF THE DAY: I have two tips, really. One pertains to using Washi tape. I find that it works best when you cut the tape a bit longer than your card and wrap it around to the back. That way, the edge doesn't come loose and stick to the card in front of it in the box. As you see from the note above, these cards are handled by many people and are boxed several times. Loose edges cause havoc and sometimes even ruin other cards. I hate when that happens! We work so hard on our creations and little steps like this can help them from being damaged.
TIP 2: I had a "AH HA" moment last night - the light bulb actually went off over my head! I love the dies that are intricate but I have always had problems attaching the cut-outs to the card. No matter what technique I used, glue or tape came through the holes and again, often stuck the card to the one in front of it. And believe me - I am very careful when trying to wipe off excess glue and tape. But, with these delicate die cuts, I find it very hard getting a clean adherence. ATG tape comes through the small spaces. No matter how careful I am about wiping off excess tape when using the sticker machine, I can never get it all off. Liquid glue with a small nozzle works, but is often very time consuming. As a last result, I reached for my glue stick ( the one made for kids, is washable and goes on purple but dries clear). I dabbed, not stroked, the glue on my cut-out piece and when I attached it to my card, I pressed it down with a paper towel. Since the glue is purple when applied, it was very easy to see if any came through the holes and was easy to clean off. I am thrilled to say it works and is so simple. Here are some examples:
On the wreath....
On the pine needles and the pine cone...
On the tree trunks...
On the tree branches...
Everything is firmly glued down. No loose ends or edges to catch on another card. I am excited. I did have one glue stick that was old and the glue part was a bit harder and didn't dab. It went into the trash. Fresh glue sticks dab just super great and work! Try it if you are having this problem of loose ends.
Let me know if this helped you. I would love to see some cards where you used this technique. Or where you used Washi tape.
Thanks for stopping by.
Hugs, Jill


